In the realm of motorcycles, fairings hold a position of undeniable importance. Functioning as a protective shield, they safeguard the rider from wind, debris, and inclement weather, while also enhancing the aerodynamics of the motorcycle.
However, these protective shells, often seen adorning the body of motorcycles, may undergo damage and wear over time. But fear not, fixing them is not as daunting as it might seem!
“Remember, the journey of repairing a damaged motorcycle fairing begins with understanding its importance and functionality. It paves the way to a smoother and safer ride.”
Steps to Fix Motorcycle Fairings
As you embark on your fairing repair journey, there are steps to be followed diligently. These steps, when executed with care and precision, can restore your fairings to their original glory.
Assessing the Damage: Before you start fixing, identify the extent of the damage. This step is crucial in determining the right course of action.
Gathering the Right Tools: Depending on the damage, you’ll need a variety of tools. These might include sandpaper, primer, paint, and a plastic repair kit.
Repairing the Fairings: With your tools at hand, the actual repair process begins. Follow the instructions on your repair kit diligently.
Finishing Touches: Once the repair is done, use sandpaper to smoothen the surface. Follow this up with primer and paint to make your fairing look as good as new.
Let’s dive deeper into the world of motorcycle fairing repair and explore each step in detail.
Understanding the Damage
Understanding the extent of damage on your fairings is crucial. It’s like a doctor diagnosing the patient before prescribing treatment. Is it a minor scratch or a major crack? The answers to these questions will determine the tools needed and the repair techniques to be used.
Type of Damage
Repair Method
Minor scratches
Sanding and painting
Major cracks
Plastic welding or using a repair kit
In conclusion, repairing motorcycle fairings is not just about fixing a part of your bike. It’s about understanding their importance, assessing the damage, gathering the right tools, and using the correct techniques to mend them. So, roll up your sleeves and get ready to infuse a new life into your motorcycle fairings!
Types of Motorcycle
Fairings and Their Materials protective shells found on the frame of motorcycles, not only serve aesthetic purposes but also protect the rider from wind and potential hazards. However, despite their toughness, fairings are still susceptible to damage and may need occasional repair. Let’s delve into the types of motorcycle fairings and their materials before we start repairing them.
Types of Motorcycle Fairings
Full fairings: Offering the most coverage, these fairings are popular in sport and racing bikes. They cover the engine and the lower half of the motorcycle.
Half fairings: Predominant in touring and street bikes, they cover the area around the handlebars and headlights.
Quarter fairings: Commonly found in cruiser bikes, these minimal fairings cover only the area around the headlights.
Materials Used in Motorcycle Fairings
ABS Plastic: Often used due to its light weight and high impact resistance, ABS plastic is the most common material for motorcycle fairings.
Fiberglass: Although slightly heavier than ABS plastic, fiberglass is favored for its flexibility and ease of repair.
Carbon Fiber: A popular choice for racing motorcycles due to its high strength-to-weight ratio, but often more difficult to repair.
Remember, the type and material of your fairing will directly affect how you approach the repair. Understanding these basics is the first step towards fixing your motorcycle fairing effectively.
Motorcycle fairings, the shells placed over the frame of the motorcycle to reduce air drag, are not just aesthetic accessories. They are your bike’s armor, its shield against the elements, the wind, and debris. However, like any other motorcycle part, they are susceptible to a variety of issues.
“Motorcycle fairings are like the knights of old – dashing and functional, but not invincible.”
1. Cracks and Breaks
One common problem is cracks and breaks. These can occur due to various reasons such as accidents, improper installation, or just the wear and tear of regular use. Cracks can gradually grow, compromising the structural integrity of the fairings.
2. Faded Colors
Another issue that often plagues motorcycle fairings is faded colors. The sun’s ultraviolet rays, rain, and pollutants can take a toll on the fairings’ paint, causing it to fade or peel off.
3. Loose Fittings
Loose fittings are also a common headache. Loose or ill-fitted fairings can lead to rattling sounds while riding, which can be distracting and potentially dangerous.
4. Scratches and Scuffs
Lastly, every rider’s nightmare – scratches and scuffs. These unsightly marks can mar the beauty of your motorcycle, but more importantly, deep scratches can expose the underlying material to the elements, leading to further damage.
Problem
Causes
Effects
Cracks and Breaks
Accidents, improper installation, wear and tear
Compromises structural integrity
Faded Colors
Sun’s ultraviolet rays, rain, pollutants
Fading or peeling paint
Loose Fittings
Poor installation, worn-out screws
Rattling sounds, potential danger
Scratches and Scuffs
Accidents, mishandling
Damages aesthetics, exposes material to the elements
Tools and Materials Needed for Fixing Motorcycle Fairings
Just like a skilled artist needs the right palette of colors, fixing motorcycle fairings requires a specific set of tools and materials. We’ll dive into what those are so you can ensure you’re fully prepared for the task ahead.
Essential Tools
Sandpaper: A must-have in your toolkit. You’ll need a variety of grits, from coarse to fine, for smoothing out the damaged area and preparing it for repair.
Body Filler: This is used to fill in any deep scratches or dents in the fairing.
Putty Knife: A versatile tool for applying and spreading the body filler.
Primer: This prepares the repaired area for painting, ensuring a smooth and even finish.
Paint: Choose a color that matches your motorcycle’s existing paintwork. Don’t forget to add a clear coat for added protection and gloss.
Additional Materials
Clean Cloth: To clean the damaged area before you start working on it.
Masking Tape: Useful for defining the area you’re working on and protecting the rest of the fairing.
Gloves: Always prioritize safety! Gloves will protect your hands from any abrasive materials.
Remember, preparation is key! Having the right materials at hand will make the repair process smoother and more efficient.
Tools and Materials Overview
Tools
Materials
Sandpaper, Body Filler, Putty Knife, Primer, Paint
Clean Cloth, Masking Tape, Gloves
Now that we’ve got our tools and materials lined up, we’re ready to jump into the repair process. With a bit of patience and perseverance, you’ll have your motorcycle fairings looking as good as new!
Step-by-Step Guide on How to Fix Motorcycle Fairings: Preparation
Motorcycle enthusiasts, we know how you treasure your ride. But, alas, accidents happen and fairings can get damaged. But worry not, we got your back! We have compiled the ultimate step-by-step guide on how to fix those fairings back to their original glory. Let’s dig in!
Step 1: Gather Your Materials
Begin by assembling all the necessary materials. It’s crucial to be prepared, as this will make your task more manageable and less time-consuming.
Plastic welding kit: This is a must-have for repairing motorcycle fairings.
Sandpaper: You’ll need a variety of grits, typically ranging from 80 to 1500.
Plastic cleaner: To ensure a clean surface before you begin the repair.
Primer and paint: To finish off the repair and make it look as good as new.
Step 2: Clean the Fairing
Once you have all your materials, it’s time to start the repair process. First, clean the fairing thoroughly with plastic cleaner to remove dirt and debris. This ensures a clean and smooth surface for the repair.
Remember, preparation is key to a successful repair. A clean surface will provide the perfect canvas for your repair work.
Step 3: Identify the Damage
Now, let’s identify the damage. Look for cracks, scratches, or holes. This will determine the method of repair. For instance, small scratches can be fixed with a simple sanding and repainting, while large cracks might require plastic welding.
Step 4: Repair the Damage
Repairing the damage varies based on what you have identified in the previous step. Here’s a general guide:
Small scratches: Sand the area with high-grit sandpaper until the scratch is gone, then repaint.
Large cracks or holes: Use the plastic welding kit. Fill the crack or hole with the welding material, then smooth it out with a plastic smoothing tool.
Step 5: Finish the Repair
Once the repair is done, it’s time to finish up. If you have used plastic welding in the process, you might need to sand the area to ensure it’s smooth. Next, apply the primer and let it dry before applying the paint. Make sure to match the paint to your motorcycle’s color for the best results.
Step
Description
1
Gather your materials
2
Clean the fairing
3
Identify the damage
4
Repair the damage
5
Finish the repair
And voila! You’ve successfully fixed your motorcycle’s fairing. Remember, practice makes perfect. Don’t be discouraged if your first attempt isn’t flawless. Keep at it, and you’ll be a fairing repair expert in no time!
Step-by-Step Guide on How to Fix Motorcycle Fairings: Sanding and Filling
Motorcycle fairings, those sleek, aerodynamic shells that both protect your bike and give it a sleek look, can often take a beating. Whether it’s due to an unfortunate spill, wear and tear, or the ravages of time, fairings may eventually need a little TLC. Let’s dive right into how you can restore your motorcycle fairings to their former glory, starting with the crucial process of sanding and filling.
Materials You’ll Need
Sandpaper: You’ll need a variety of grits, from coarse to fine, to properly prepare the surface of your fairing.
Filling Compound: Choose a high quality, durable compound that’s specially designed for plastic surfaces.
Primer: A primer helps the paint stick to the surface and lasts longer.
Paint: Make sure to match your motorcycle’s color as closely as possible.
Clear Coat: This is used to protect the paint and give it a glossy finish.
Step-by-Step Process
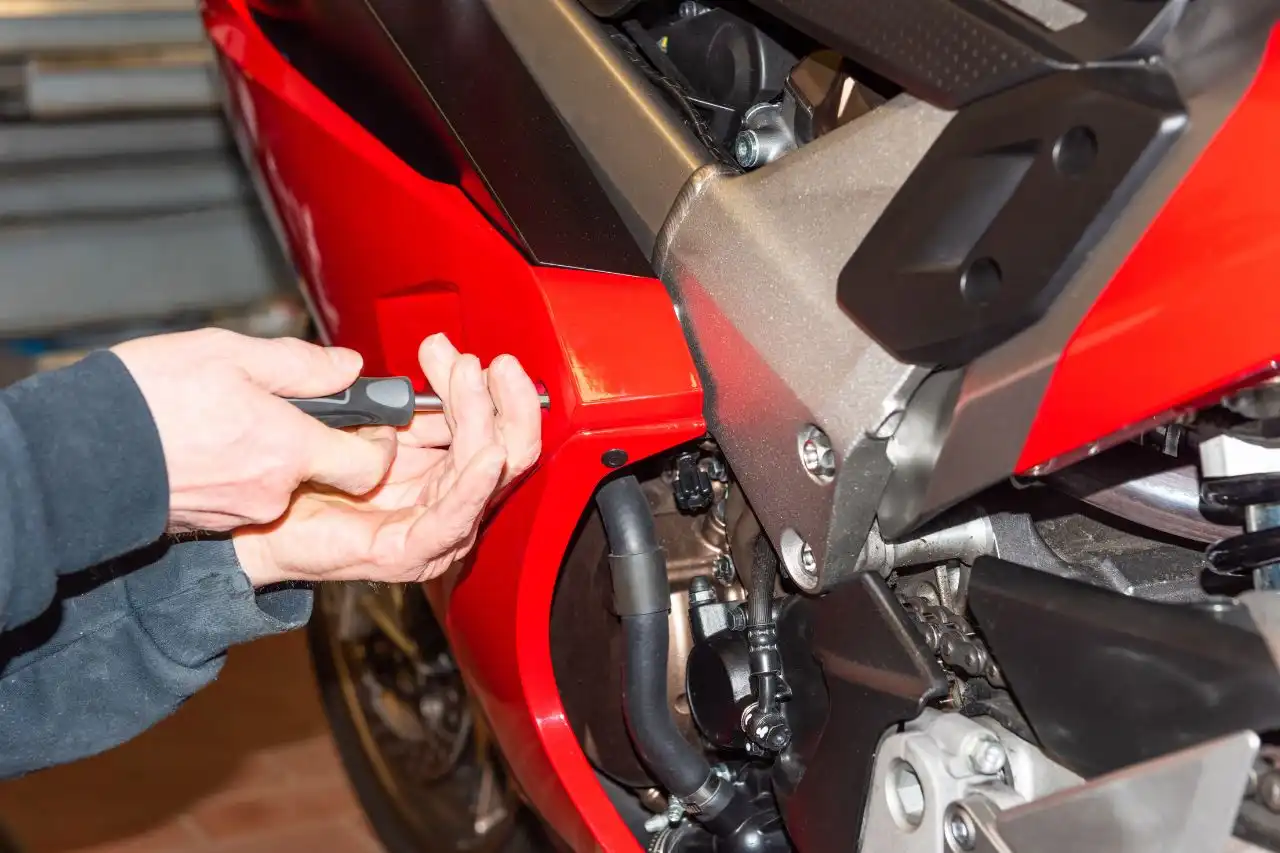
Removing the Fairing: Start by carefully removing the fairing from your motorcycle. Ensure all screws and clips are kept safely.
Sanding: Using coarse grit sandpaper, gently sand the damaged area. This helps to remove the damaged surface and creates a good base for the filler.
Filling: Apply the filling compound to the sanded area, making sure to completely cover the damage. Allow it to dry as per the manufacturer’s instructions.
Sanding Again: Once the filler has dried, sand the area again with a finer grit sandpaper. This helps to smooth out the filler and blend it with the rest of the fairing.
Priming: Apply a layer of primer to the repaired area. This helps the paint adhere better and last longer.
Painting: Once the primer has dried, apply the matching paint to the repaired area. Ensure a seamless blend with the rest of the fairing.
Clear Coating: After the paint has dried, apply a clear coat for a glossy, protective finish.
Remember: Patience is your best ally in this process. Don’t rush through the steps. Instead, take your time to ensure each step is done thoroughly and correctly for a flawless finish.
Common Mistakes to Avoid
Mistake
Why it’s a Problem
How to Avoid it
Skipping Primer
Without primer, the paint may not adhere properly and could peel off over time.
Always apply primer before painting.
Not Allowing Drying Time
Rushing the process can lead to smudged paint and an uneven finish.
Follow manufacturer instructions for drying times.
Using Wrong Filler
Not all fillers are suitable for plastic surfaces and could lead to further damage.
Choose a filler specifically designed for plastic surfaces.
Fixing motorcycle fairings may seem like a daunting task, but with the right tools, a bit of patience, and this step-by-step guide, you are well on your way to restoring your bike’s aesthetic appeal. So why wait? Roll up your sleeves, and let’s bring that motorcycle back to life!
Step-by-Step Guide on How to Fix Motorcycle Fairings: Priming and Painting
Believe it or not, motorcycle fairings, those protective sheets of plastic that shield your bike and enhance its aerodynamics, can be repaired right in the comfort of your home garage. Broken, cracked, or chipped, these fairings can be brought back to life with a bit of patience, some basic tools, and a knack for DIY. So, let’s dive right into the details of how to fix motorcycle fairings, focusing particularly on the priming and painting process.
What You’ll Need
Before we start, let’s gather all the necessary tools and materials. Keep in mind, the right tools can make a world of difference in the quality of your work.
Sandpaper: You’ll need a variety of grits, typically ranging from 400 to 2000 grit.
Primer: A good quality primer is essential for a smooth and professional-looking finish.
Paint: Choose a paint that matches your bike’s color.
Clear Coat: This will protect your paint job and give it a glossy finish.
Body Filler: For filling in any cracks or deep scratches on the fairing.
Plastic Welding Kit: If the plastic is cracked, this will help mend it together.
Step 1: Prep the Fairing
The first step involves preparing your fairing for the repair process. Start by cleaning the fairing thoroughly, making sure any dirt, oil or debris is removed. Then, using your sandpaper, sand down the damaged area. The goal here is to create a surface that the body filler, primer, and paint can adhere to. So take your time, ensuring the area is smooth and ready for the next steps.
Step 2: Apply Body Filler
If there are any cracks or deep scratches on the fairing, now is the time to address them. Mix your body filler according to the manufacturer’s instructions and apply it to the damaged areas. Once the filler has dried, sand it down until it is level with the rest of the fairing. Remember, the smoother the surface, the better the end result will be.
Step 3: Apply Primer
With the fairing prepped and the body filler applied, you’re now ready to prime the fairing. Apply a coat of primer, ensuring that you cover the entire area you plan to paint. Let it dry completely before moving on to the next step.
Step 4: Paint the Fairing
Now comes the exciting part – painting! Apply the paint in thin, even layers, allowing each layer to dry before applying the next. For the best results, apply at least two or three layers of paint. This will ensure a rich and even color.
Step 5: Apply Clear Coat
The final step in the process is to apply a clear coat. This will seal and protect the paint, while also giving it a professional, glossy finish. Again, apply in thin, even layers, allowing each layer to dry before applying the next.
Remember, patience is key when it comes to fixing motorcycle fairings. Don’t rush the process. Take your time with each step, ensuring the job is done right and you’ll be rewarded with a bike that looks as good as new.
A Quick Recap
Steps
Materials Needed
Expected Time
Prep the Fairing
Sandpaper
30 minutes
Apply Body Filler
Body Filler
1 hour
Apply Primer
Primer
10 minutes
Paint the Fairing
Paint
2 hours
Apply Clear Coat
Clear Coat
1 hour
So, there you have it – a step-by-step guide to fixing your motorcycle fairings. With just a few tools and materials, you can restore your bike to its former glory, saving yourself the cost of a professional repair job. Happy fixing!
Step-by-Step Guide on How to Fix Motorcycle Fairings: Reassembling and Final Touches
Certainly! Below is a step-by-step guide on how to reassemble and perform the final touches when fixing motorcycle fairings.
Fixing motorcycle fairings can seem like a daunting task, but never fear, dear reader! With the right tools and a sprinkle of patience, you’ll be amazed at what you can accomplish. Let’s dive into the process of reassembling and adding the final touches to your motorcycle fairings.
Reassembling the Fairings
Firstly, gather all the fixed fairing pieces. At this point, they should be smooth, painted and ready to be reassembled. Remember, patience is key in this process.
Align all the fairing pieces on the motorcycle.
Start with the largest pieces first, then work your way to the smaller ones.
Use your hands to lightly press the pieces together to ensure proper alignment.
Secure each piece with the correct screws and bolts. Tighten them just enough to hold the pieces together, but not too tight to avoid cracking the plastic.
Once all the pieces are secured, go back and tighten all the screws and bolts completely.
Final Touches
With the fairings now securely in place, it’s time for the final touches. This is where your motorcycle starts to come back to life and shine brighter than ever!
Wipe down the fairings: Use a soft cloth to gently clean the fairings. This removes any dust or fingerprints left during the reassembling process.
Check for any imperfections: Look over the fairings for any missed scratches or dents. If you find any, use a small amount of touch-up paint to cover them.
Polish the fairings: Apply a thin layer of motorcycle polish to the fairings. This will give them a glossy finish and protect the paint.
Remember, the devil is in the detail. Take your time during these final steps to ensure your motorcycle looks its absolute best.
A Quick Review
Let’s quickly summarize what we’ve covered in this guide:
Steps
Key Points
Reassembling the Fairings
Gather and align all fairing pieces, secure with screws and bolts.
Final Touches
Wipe down, check for imperfections, and polish the fairings.