Getting to grips with motorcycle maintenance couldn’t be more crucial, and if there’s one thing that often gets overlooked, it’s the condition of the bike chain. This strong little component plays a pivotal role in bringing your motorcycle to life, transferring power from the engine to the wheels. Therefore, being able to spot any potential hitches early before they culminate in problems is essential.
In the dialogue that follows, we’ll be nudging you in the right direction, enabling you to identify the symptoms of motorcycle chain problems. Moreover, we will equip you with remedial solutions you can promptly execute to prevent these issues from escalating. Now, let’s jump in and rev up your knowledge on motorcycle chain health.
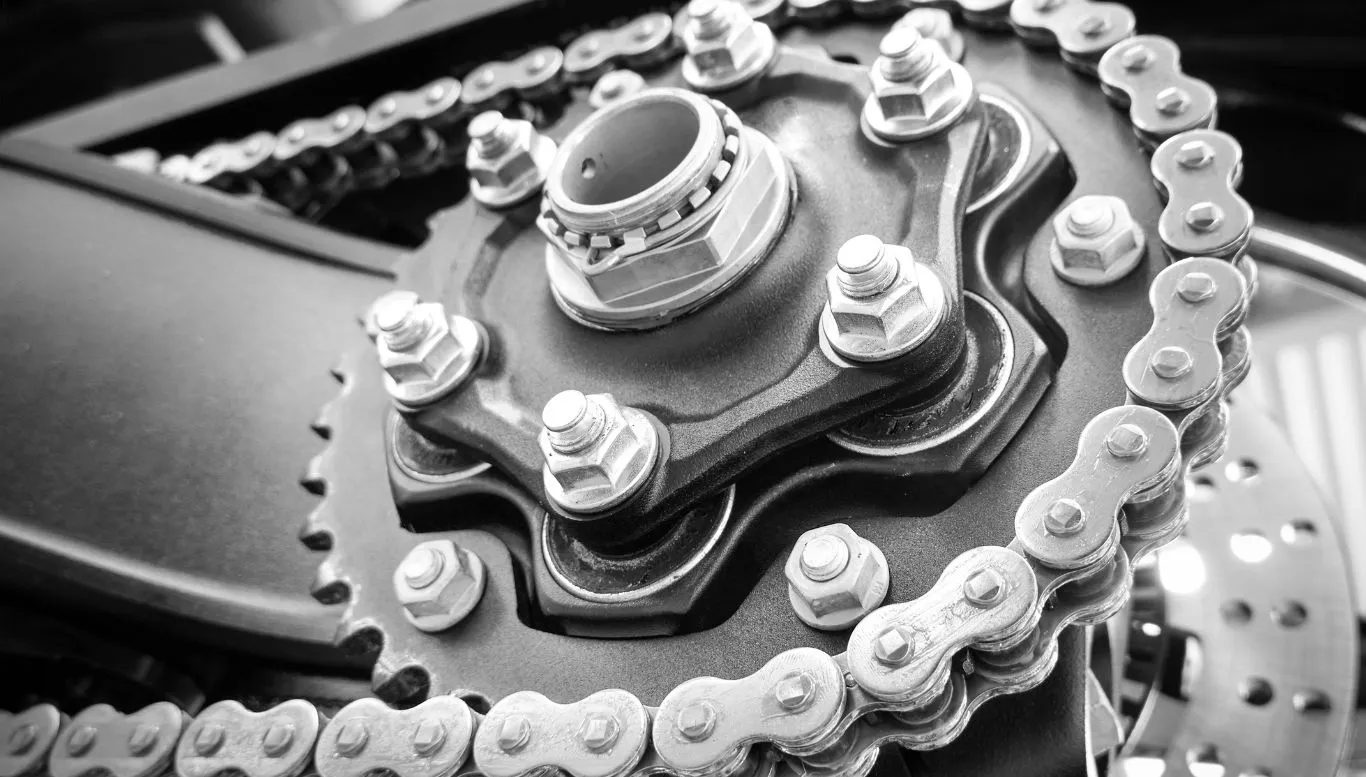
Common Symptoms of Motorcycle Chain Problems
As a motorbike owner, ensuring your motorcycle’s proper functioning is vital to your safety and riding enjoyment. One aspect of motorcycle upkeep that is often overlooked is the chain. Understanding the symptoms of motorcycle chain problems is a must in ensuring the good health of your two-wheeler. Now, let’s dive into the common signs of motorcycle chain issues and how to resolve them.
Persistent Noise from Chain
An unrestricted noise from the chain, especially while you’re riding, can be a telltale sign of a chain problem. This could indicate that the chain is loose or improperly lubricated.
Solution:
- Check the chain tension to see if it’s within the recommended limits. If it’s overly loose, adjust it as required.
- Ensure the chain is well-lubricated. If it’s excessively dry, apply a suitable chain lubricant.
Decrease in Motorcycle Performance
If you’re noticing a decline in your motorcycle’s performance, such as a loss of power or lower fuel efficiency, a faulty chain might be behind the issue. A stretched or worn-out chain can lead to insufficient power transfer, negatively impacting performance.
Solution:
- Inspect the chain for signs of wear and tear. If excessively worn, consider replacing it.
- Ensure your motorcycle chain is clean and free of grime or dust buildup, which might cause it to elongate or stretch.
Chain Skipping or Binding
If your motorcycle chain is jumping across the sprocket or binding during rides, it points to a severe chain problem. This can result in a dangerous situation while riding at high speeds.
Solution:
- Examine your sprockets for damage and wear. Replace them if necessary.
- Consider getting your entire chain drive serviced or replaced, as continuous jumping or binding might damage your motorcycle’s transmission in the long run.
1. Unusual Noises: A Sign of Chain Issues
in tune with the sounds of your motorcycle can be the key to diagnosing potential problems earlier on. One of the most frequent signs of issues with your motorcycle chain is the emission of unusual noises. It’s like your bike is trying to communicate, telling you it needs some attention. But what does this suspicious noise mean? And how can you handle it? Let’s find out!
Identifying Unusual Noises
When you start noticing that your bike is noisier than usual, it’s time to investigate. The unnerving sounds could come from your motorcycle chain if it is too loose, too tight, or not properly lubricated. Some of the sounds to look out for include a loud clattering noise, frequent squeaking, or a grinding sound. Remember, a well-maintained motorcycle chain should merely release a light mechanical noise.
Troubleshooting the Noise
Once you’ve identified that the noise is indeed coming from the motorcycle chain, it’s time to address the issue at the root.
Chain Tension
If the chain is either too tight or too loose, it might be the cause for the unusual noise. You can check this by measuring the chain slack according to your bike’s specifications, usually found in the owner’s manual. If necessary, adjust the tension accordingly.
Lubrication
A poorly lubricated chain can also emit noise. Applying a high-quality chain lube can mitigate this problem. Focus on the inner part of the chain, as this is where it frequently contacts the sprockets.
Wear and Tear
Remember, every part of the motorcycle has a lifespan. Continuous usage without proper upkeep can lead to wear and tear, producing unusual noise. If you’ve checked the tension and lubrication and you still hear noise, it may be time to consider replacing your motorcycle chain.
2. Excessive Chain Slack: A Troubling Indication
Experiencing an abnormal looseness in your motorcycle chain, or excessive chain slack, is a clear indicator something could be wrong with your motorcycle chain, requiring immediate. your attention is just This a minor not hiccup that you can ignore as it can lead to severe safety concerns if not addressed promptly.
Why Excessive Chain Slack is a Problem
Motorcycle chains are designed to maintain a specific level of tension to ensure optimal performance and safety. When a chain becomes excessively slack, it has the potential to disengage from the bike’s sprockets, which not only leads to a decrease in acceleration but can also pose a significant safety risk. A slack chain can also wear out the sprockets prematurely.
Preventing excessive chain slack not only enhances the motorcycle’s performance and lifespan but also significantly improves your safety while on the road.
Causes of Excessive Chain Slack
- Insufficient Tensioning: If the chain tension was not properly set to begin with, your chain might develop excessive slack. This usually happens if the chain was installed without considering the manufacturer’s recommendations for chain slack.
- Inadequate Lubrication: Lubrication reduces friction and keeps the chain stretch, thus creating more slack than normal.
- Normal Wear and Tear: running smoothly. Lack of proper lubrication can lead to chain Over time, slack. Regular inspections and naturally stretch and wear down, which excessive result chains in can maintenance can help to identify and address issue this early.
- Regular Inspections: Regularly inspect your motorcycle chain for signs of wear and ensure it maintains the correct tension.
- Proper Lubrication: Use a high-quality chain lubricant and apply it regularly to reduce friction and avoid premature chain stretching.
- Use Correct Tension: Adjust the chain tension according to the manufacturer’s recommendation. If you’re unsure about how to do this, seek professional help.
3. Chain Skipping: Causes and Solutions
. Your motorcycle’s chain is skipping. This unexpected hitch not only disrupts your smooth ride but, if overlooked, could lead to major mechanical failures. Understanding the causes of chain skipping and knowing how to troubleshoot and fix the issue can save you a significant amount of time and money, not to mention enhance your biking experience. Let’s dive deeper into the world of chain skipping.
The Underlying Causes of Chain Skipping
In most cases, a skipping chain is a signal of a poorly maintained chain or sprocket. Several aspects can contribute to this problem:
- Chain slack: If the chain is too loose, it has a higher probability of skipping over the sprockets.
- Worn out sprockets: Over time, the teeth of the sprockets can wear down, reducing their grip on the chain.
- Lack of lubrication: Insufficient lubrication increases friction and can cause the chain to skip due to increased heat and wear.
- Misaligned sprockets: If the sprockets are not properly aligned, the chain may not fit correctly, leading to skipping.
Solutions to Chain Skipping
Addressing chain skipping calls for a serious bit of attention. Here’s what you need to do:
- Adjust chain tension: Refer to your motorcycle’s owner’s manual for the appropriate chain slack. Carefully adjust the chain to the recommended tension.
- Replace worn out sprockets: If your sprockets have lost their teeth, it’s time for a replacement. Worn sprockets can damage a new chain as well. Always replace both at the same time.
- Proper lubrication: Ensure to regularly lubricate your chain for a smooth ride and to increase the lifespan of your motorcycle’s chain.
- Align your sprockets: Misaligned sprockets can cause serious chain problems. Properly align the sprockets and check the condition of axial alignment between the sprockets.
4. Chain Tension: Finding the Right Balance
Getting the chain tension right on your motorcycle is a bit of a balancing act. Too slack and you risk chain skipping or damage; too tight and you can cause premature chain and sprocket wear. Finding that middle ground is essential for the longevity of your chain and ultimately, your motorcycle’s performance. Below are some tips and guidance to help you achieve the perfect chain tension.
Understanding the Importance of Chain Tension
First and foremost, it’s crucial to understand why chain tension matters. In essence, proper chain tension ensures the power from your engine is effectively transferred to your rear wheel. It minimizes unnecessary stress on your motorcycle’s transmission and reduces the risk of excessive wear and tear. Plus, it provides a smoother ride and better overall performance.
How to Check Chain Tension
The process of checking chain tension is rather simple:
- 1. Put your motorcycle on its side stand.
- 2. Find the midpoint of your chain.
- 3. Apply upwards pressure and measure the distance it moves. The specific measurement range will depend on your motorcycle model (check your manual for specifics).
Adjusting Chain Tension
If you find that your chain tension is off, don’t fret. Adjusting is rather straightforward. Here are the steps-
- 1. Loosen the rear axle nut.
- 2. Use the adjustment bolts to either increase or decrease tension.
- 3. Check tension repeatedly during this process to ensure you’re getting it right, without over-tightening.
- 4. Once tension is correct, tighten the rear axle nut to finish.
Regular Maintenance is Key
Finding the right chain tension isn’t a ‘set it and forget it’ type of deal. Chains naturally stretch and wear with use, so it’s important to check tension regularly and adjust as necessary. Combine this with routine cleaning and lubrication, and you’ll greatly extend the life of your motorcycle chain.
5. The Dangers of a Worn-Out Chain
riders may overlook is riding with a worn-out chain. This potentially disastrous condition not only affects the smoothness of your ride, but it can also be a hazard to your personal safety. When your motorcycle chain is excessively worn or improperly maintained, it can lead to a host of problems, including damaged sprockets, impaired performance, and unexpected chain failure while in motion.
Recognizing a Worn-Out Chain
The key to mitigating the risks associated with a worn-out chain is to recognize the early signs of deterioration. A chain that is stretched beyond its intended capacity is an obvious symptom of wear. This can be indicated by an inability to maintain proper tension or an excessive amount of slack. Additionally, look for signs of rust and broken links, as these are clear indicators of a chain that needs to be replaced.
- Distorted Links: This can cause rough riding and unusual noise as the chain moves across the sprockets.
- Tight Spots: These occur when some parts of the chain have more tension than others, causing irregular movements and potential chain skipping issues.
Issues Stemming from a Worn-Out Chain
When left unchecked, a worn-out chain can lead to a multitude of serious problems, including:
- Decreased Performance: A worn-out chain can reduce the efficiency of power transmission from the engine to the wheel, leading to sluggish performance.
- Damage to Other Components: It can also cause undue stress and wear on the sprockets, clutch and transmission system.
- Sudden Chain Breakage: Perchance the most dangerous repercussion is the risk of the chain snapping whilst riding, which could lead to an accident.
Resolving Worn-Out Chain Problems
A timely response to these signs can help preserve your safety and extend the lifespan of your motorcycle. Replacing a worn-out chain promptly is the most effective measure to resolve these issues.
- Replacements: Look for a quality chain that is compatible with your particular motorcycle model. Also, consider changing the sprockets during the chain replacement to ensure smooth operation.
- Proper Maintenance: Regularly clean and lubricate your motorcycle chain to prevent premature wear and tear, and ensure its longevity.
- Regular Inspections: Routinely inspect the chain for any signs of wear or stretching and make necessary adjustments or replacements.
6. Chain Rust: Prevention and Treatment
Rust is a common enemy of motorcycle chains. If not treated promptly and properly, it could lead to a multitude of problems including reduced performance and potentially dangerous malfunctions. Hence, understanding how to both prevent and treat rust can be vital in maintaining or improving your bike’s longevity and functionality.
Identifying Rust on a Motorcycle Chain
A visibly reddish-brown crust appearing on your chain often signifies rust formation. This condition is worsened when the motorcycle is often exposed to moisture or when chain lubrication is neglected, both conditions accelerating the oxidation process.
Rust Prevention
Prevention is invariably superior to cure. You can protect your motorcycle chain from rust by undertaking the following measures:
- Regular Cleaning: Clean your chain at least every 400-500 miles to eliminate moisture-attracting debris
- Timely Lubrication: Regular lubrication serves to create a barrier which reduces the chances of rust formation
- Proper Storage: Park your motorcycle indoors or use a cover to protect the chain from atmospheric conditions, which can facilitate rust.
Rust Treatment
If your chain is already afflicted with rust, fret not. With the right approach, you can restore it to its former glory. Here’s how:
- Scrubbing: Use a sturdy brush to scrub off the rust
- Chemical Solutions: Certain rust-removing solutions available in the market can aid in this process
- Seek Professional Help: In severe cases, consider seeking advice or service from a professional rideshop.
7. How to Inspect Your Motorcycle Chain
Knowing your motorcycle inside out is instrumental in upholding its optimal performance and enhancing its lifespan. Conducting timely inspections of your motorcycle chain assists you in spotting any concerns in the early stages, thereby preventing serious issues down the line.
Regular checks bring to your attention disturbances such as changes in noise, heightened tension, visible rust, or wear and tear – all of which are indicators of an impending chain-related problem. Here is a succinct yet comprehensive guide designed to help you examine your motorcycle chain like a seasoned professional.
Prepare your Motorcycle for Inspection
Before inspecting the chain, ensure you position the motorcycle on a flat surface and stabilise it with a center stand if available. If not, side stands will work but ensure it’s stable to avoid accidents.
Perform a Visual and Manual Check
Start your inspection by looking at the overall condition of the chain while slowly turning the wheel. Look out for noticeable signs of rust or wear. It’s also crucial to run your gloved hand along the chain to look for abnormalities not visible to the naked eye, like stiff links.
Check for Adequate Lubrication
A well-lubricated chain ensures that the links can bend and rotate freely. Check your chain’s lubrication by feeling it with your gloved hand. If it’s too dry, it’s time for lubrication. Conversely, over-lubrication can attract dirt, leading to blocked links and, subsequently, a stiff chain.
Examine the Chain Tension
Each motorcycle has specified tension standards for the chain, and it’s crucial to keep within these limits. You can check for tension by pushing up and pulling down the chain in the middle. If it moves more than the manufacturer’s limit, it could lead to chain slack.
Verify the Sprocket Condition
The condition of your sprocket plays a significant role in your chain’s health. Inspect for any worn or chipped teeth on your sprocket as this can lead to skipping and, eventually, chain failure.
Key Takeaway
Remember, frequent inspections and prompt action can prevent severe problems, protect your safety, and prolong your motorcycle chain’s lifespan.
8. Choosing the Right Lubricant for Your Chain
Keeping your motorcycle chain well-lubricated is essential to ensure smooth running and prolong its lifespan. Lubricating the chain reduces friction, which in turn minimizes wear and tear, enhancing the overall performance of your motorcycle. The type of lubricant you use plays a significant role, but choosing the right one can feel like a daunting task with the variety of options available. Here’s a guide to simplify the process.
Different Types of Chain Lubricants
Generally, chain lubricants fall into two categories; dry lube and wet lube. Dry lube is best for dry, dusty conditions, forming a dry layer over the chain to resist dust collection. On the other hand, wet lube is ideal for damp and wet conditions, providing a strong protective layer against moisture.
Considerations When Choosing a Chain Lubricant
When choosing a chain lubricant, consider your driving conditions. If you often ride in damp, wet environments, a wet lube will be the best option. However, if you ride in dry conditions, a dry lube will be more suitable. Additionally, take a look at the manufacturer’s recommendations. These can provide invaluable insights into what will work best with your motorcycle.
- Weather Conditions: Choose a lubricant suitable for the weather conditions you typically ride in.
- Manufacturer’s Recommendations: Always check the manufacturer’s guidelines when selecting a lubricant.
Applying Motorcycle Chain Lubricant
Once you’ve chosen your lubricant, application is the next step. Start by cleaning your chain to remove any dirt or debris. Then, apply the lubricant evenly across each link, ideally after a ride when the chain is warm. This allows the lubricant to penetrate deeply, ensuring maximum effectiveness.
- Clean First: Always clean your chain before lubricating to enable efficient absorption.
- Warm the Chain: Acting post-ride when the chain is warm allows the lubricant to penetrate well.
- Wipe Excess: After lubrication, wipe off any excess to prevent it from attracting dirt and particles.
Step-by-Step Guide: Cleaning Your Motorcycle Chain
Cleaning your motorcycle chain is essential to ensuring a smooth and safe ride. A dirty chain can not only affect your motorcycle’s performance but could potentially lead to dangerous situations. Knowing how to effectively clean your motorcycle chain can save you from a serious accident and extend the life of your chain. It’s a process that requires regular maintenance and careful attention to ensure the longevity and efficiency of your bike.
Step 1:
Gather Your Cleaning Supplies To clean your motorcycle chain effectively, you will need some essential supplies. These include a chain cleaning brush, a good quality motorcycle chain cleaner, a cloth, and a pair of gloves to protect your hands.
Step 2:
Safely Position Your Motorcycle Before you start the cleaning process, make sure your motorcycle is safely positioned. If your motorcycle has a center stand, use it; if not, you may need to use a paddock stand. Ensure the bike is stable before you start to prevent any accidents.
Step 3:
Application of Chain Cleaner Spray the chain cleaner onto the motorcycle chain, ensuring that you cover every part. Be generous with your application but avoid spraying too much as this can lead to wastage.
Step 4:
Scrub the Chain Using your chain cleaning brush, scrub the chain to remove build-up dirt, grime, and dust. Make sure you scrub every part of the chain, including the hard-to-reach areas.
Step 5:
Wipe off the Residue After scrubbing, use your cloth to thoroughly wipe off the residue left from the cleaning process. It’s important to remove all the residue before applying lubricant to the chain.
Step 6:
Allow the Chain to Dry Allow the chain to dry completely before moving on to the next step. This is to ensure that the lubricant to be applied adheres properly to the chain.
Step 7:
After you’ve ensured that the chain is dry, the last step involves the application of a motorcycle chain lubricant. This step is crucial in maintaining the performance and lifespan of your chain as the lubricant minimizes friction, prevents corrosion, and helps keep the chain flexible. Below are some key points to consider when applying chain lubricant:
Choosing the Right Lubricant
Two of the most common types of motorcycle chain lubricants are traditional oil-based lubricant and wax-based lubricants. An oil-based lubricant penetrates deeply into the chain, offering excellent lubrication. However, it can fling off rapidly and may attract dust, requiring more frequent application. On the other hand, a wax-based lubricant leaves a dry and tacky surface after drying, attracts less dust and dirt, and requires less frequent application.
How to Apply Chain Lubricant
Lubricating a motorcycle chain properly involves the following steps:
- Shake the can of chain lubricant before using.
- Apply a steady stream of lubricant along the inside of the chain, on the sides that contact the sprockets.
- Slowly rotate the rear wheel to ensure even distribution of the lubricant along the entire length of the chain.
- Try to avoid applying an excessive amount of lubricant, as it can fling off as you ride and cause a mess.
- Wait for the lubricant to penetrate into the chain links before riding your motorcycle. This process typically takes about 10-15 minutes.
Maintaining Chain Lubrication
Riders should aim to lubricate their chains every 300 to 600 miles to ensure optimal performance and longevity of the chain. However, this frequency may vary depending on your riding conditions. If you ride in dusty or wet conditions, applying lubricant more often could be necessary.
Chain Care Dos and Don’ts: Essential Guidelines for Riders
Caring for your motorcycle chain is a critical aspect of maintenance that can significantly improve the longevity and performance of your ride. Proper chain care involves a blend of regular checks, cleaning, lubrication, and tension adjustments, to ensure your chain is functioning optimally and safeguard it from premature wear or damage. This section provides you with essential guidelines on chain care ‘dos’ and ‘don’ts’, helping you to maintain your motorcycle chain in the best possible condition and secure a smoother and safer ride.
Chain Care Dos
Let’s start by discussing the ‘dos’, the essential care habits you should adopt to maintain your motorcycle chain effectively:
- Regular Inspection: Frequently check your motorcycle chain for any signs of wear and tear, including cracks, tight links, or excessive stretch. Regular inspection helps to catch any potential issues at an early stage, prolonging the life of your chain.
- Consistent Cleaning: Ideally, you should clean your chain every 300-600 miles, depending on your riding conditions. Use a high-quality chain cleaner and a chain brush to remove dirt, grime and other residues that collect over time.
- Correct Lubrication: Apply a suitable chain lubricant after each cleaning procedure. Chain lubrication reduces friction, prevents rust, and extends the overall lifespan of your motorcycle chain.
- Maintain Appropriate Tension: Keep your chain at the recommended tension to ensure optimal performance. An overly loose or tight chain can lead to issues such as chain skipping or premature wear.
Chain Care Don’ts
Just as there are certain practices to embrace, there are also things to avoid to prevent chain damage. Here are the ‘don’ts’ to keep in mind:
- Avoid Delayed Maintenance: Failing to maintain your motorcycle chain not only compromises performance, it can also lead to safety risks. So, never procrastinate on your chain maintenance schedules.
- Don’t Use Incorrect Lubricant: Avoid using unsuitable lubricants, such as WD-40 or engine oil, that can cause more harm than good to your motorcycle chain.
- Never Ignore Signs of Damage: Signs such as an excessively noisy chain, decreased motorcycle performance, or chain skipping indicate underlying issues. Ignoring these signs can result in severe damage over time.
- Don’t Over-Adjust Your Chain: While maintaining proper tension is crucial, over-tightening can shorten your chain’s lifespan, and under-tightening can affect your bike’s performance. Be cautious.
Conclusion
It’s clear that chain maintenance is crucial for the longevity and top-notch performance of your motorcycle. Regular inspections, use of suitable lubricants, correct tensioning, and immediate resolution of any issues like excessive noise or chain skipping can vastly influence your riding experience and the bike’s lifespan.
To sum up, being an informed rider doesn’t stop at knowing how to ride. It includes understanding the importance of chain care as part of routine motorcycle maintenance as well. You owe it to your ride to keep it running smoothly, safely and efficiently. Regular and mindful care will pay off in the long run.


")
")

