Whether you’re a novice dirt bike enthusiast or a seasoned rider, understanding your machine’s brake system is crucial. It’s the lifeblood of your ride, enabling safe and efficient movement. It’s not just about a smooth ride; understanding your brakes can mean the difference between a leisurely ride and a serious accident.
In this article, we aim to help you grasp the intricacies of your dirt bike’s brake system and provide practical solutions for common repair issues. With this knowledge at your disposal, you’ll be empowered to tackle any brake-related challenge your bike might throw at you.
Dirt Bike Brake System Explained
Getting to grips with your dirt bike’s braking system can revolutionize your riding experience. Understanding how to tackle even small problems while out on the path can save you valuable time, prevent costly fixes, and, importantly, enhance your safety. Let’s simplify and demystify the intricate world of dirt bike brake systems.
The brake system of a dirt bike is not as daunting as it seems. It’s composed of several parts working in harmony to help you control your speed and stop when required. Mastering these parts and their functions can enhance your biking experience and aid in diagnosing problems when they arise.
The Braking Principle: How It Works?
In essence, the principle of braking is quite straightforward. When you pull the brake lever, you activate the master cylinder which pushes brake fluid through the brake lines towards the brake calipers.
The calipers, equipped with brake pads, clamp down on the rotor attached to the wheel. The friction created slows down and eventually stops the bike.
Disc brakes, which function on this principle, are common in modern dirt bikes due to their reliability and superior braking performance.
Core Components of the Brake System
The following components form the backbone of your dirt bike’s brake system:
Master Cylinder: Located at the brake lever, it’s the heart of the braking system. It’s responsible for putting pressure on the brake fluid, initiating the braking process.
Brake Lines: These are tubes that transport brake fluid from the master cylinder to the calipers.
Calipers: Located on the wheel, they house the brake pads and squeeze them onto the rotor when braking.
Brake Pads: These are friction materials that press against the rotor to slow down or stop the bike.
Rotor: Attached to the wheel, the rotor is the disc that the brake pads press against.
Brake Fluid: The Lifeblood
Brake fluid plays a key role in your brake system. It’s the medium through which the pressure from the master cylinder is transmitted to the calipers. It therefore needs to have a high boiling point and resist compression.
There are several types of brake fluids, with DOT 3, DOT 4, and DOT 5 being common choices. DOT 3 and DOT 4 are glycol-based and can absorb water, minimizing the risk of vapor lock. DOT 5 is silicone-based and doesn’t absorb water, but it can trap air bubbles leading to brake failure.
Be sure to check your bike manufacturer’s specifications to know which type of brake fluid is suitable for your ride.
Drum vs Disc Brakes: Choosing the Right One
Drum and disc are the two main types of brake systems in dirt bikes. While disc brakes are more common in modern bikes, drum brakes are still found on some older models.
In a drum brake, the brake shoes push out against the inside of the brake drum, creating friction to slow the bike. Disc brakes, on the other hand, work by pressing brake pads against a rotor attached to the wheel. They offer superior performance and heat dissipation, making them the preferable choice for most dirt bike riders.
In the end, your choice will depend on your bike, riding style, and personal preference.
Parts of a Dirt Bike Brake System
The heart of a dirt bike’s maneuverability lies largely within its brake system. From brake pads to fluids, every component in this intricate setup plays a significant role to ensure that your dirt bike halts exactly when you intend it to. To make effective repairs or upgrades, it’s important to understand each part and how they collectively function.
Today, we’re diving deep into the specifics of a dirt bike brake system: the components and how they function separately and together. We’ll also cover common systems in use today and provide some repair tips. Let’s shed some light on this crucial part of your dirt bike.
Main Components of a Dirt Bike Brake System
A typical dirt bike brake system integrates numerous components that work in unison to execute efficient braking. Let’s break down the primary elements.
Brake Lever
The brake lever is essentially your braking control. Positioned on the bike’s handlebar, it acts as a trigger when you apply pressure. The force you exert on the lever transmits to the entire brake system, causing your bike to slow or stop.
Brake Lines/Hoses
Brake lines or hoses are the conduits for brake fluid. When you apply the brake lever, pressure accumulates in the brake lines, which helps in activating the brake caliper.
Brake Caliper
The brake caliper is where the actual slowing or stopping action is initiated. It houses the brake pads and pistons and, when triggered, pushes the brake pads onto the rotor.
Brake Pads
Situated within the caliper, brake pads are the components that make direct contact with the rotor. This causes friction that slows and ultimately stops your bike. The pads erode over time and usage, hence requiring regular monitoring and replacement.
Brake Rotor
The brake rotor is a circular metal disc connected to the bike’s wheel. When the brake is applied, the pads grip onto the rotor, slowing or halting the wheel’s movement, consequently braking the bike.
Brake Fluid Dynamics
Understanding brake fluid dynamics is crucial to comprehending how your bike’s braking system achieves its function. Here’s a brief overview.
Brake Fluid Reservoir
The brake fluid reservoir holds the brake fluid until it’s needed in the system. It’s typically located near the handlebars for easy access and monitoring.
Fluid Movement and Pressure
When the brake lever is applied, it forces fluid from the reservoir down through the brake lines into the caliper, activating the brake system. This decreases the bike’s speed or halts it completely by applying pressure on the brake rotor through the brake pads within the caliper.
Common Maintenance and Upkeep
Regular maintenance of your dirt bike’s brake system ensures optimal function and longevity. Here’s a quick guide.
Regular Fluid Check
Brake fluid level and quality is an often overlooked but vital aspect of bike maintenance. Low or poor-quality fluid can dramatically affect your bike’s brake performance. Check the reservoir regularly and replenish or change the fluid as needed, following your bike manufacturer’s instructions.
Regular Pad and Rotor Inspection
Check your brake pads and rotors frequently for wear and tear. Thinning pads or a pitted or scored rotor compromises braking efficiency and can lead to accidents. Replace these components as necessary to maintain optimal performance.
Line and Hose Checks
Check brake lines and hoses regularly for bends, cracks, leaks, or any other form of damage. Damaged lines or hoses can lead to performance issues or even catastrophic failure, putting your safety at risk.
Lever Maintenance
Check the brake lever for any signs of damage or excessive wear. A damaged lever could fail during operation, resulting in hazardous situations. Replace damaged parts as needed.
Types of Dirt Bike Brake Systems: Which One is on Your Ride?
Understanding the type of brake system on your dirt bike is essential for proper maintenance and optimal performance. Essentially, there are two main types you may find on your bike: drum brakes and disc brakes. The choice between these largely depends on the make and model of your bike, intended use, and personal preferences.
Both types have their unique advantages and drawbacks, affecting factors like braking power and required maintenance efforts. In this section, we’ll break down the key features of these two systems, enlighten you about which type is installed on your ride and help you comprehend the considerations for each.
Drum Brakes: The Classic Choice
As the traditional option, drum brakes were a staple on dirt bikes in the earlier days of the sport. In this system, the brake shoes push outwards against the inside of a spinning drum attached to the wheel, creating friction and thus slowing your bike down.
While they’re not as common on modern bikes, they’re still favoured by some riders for their simplicity, reliability and lower maintenance requirements. The enclosed design keeps them protected from the elements, meaning less wear and tear in challenging conditions.
However, drum brakes can be less efficient, providing less stopping power, especially in higher-speed scenarios. They’re also prone to ‘brake fade’—a decrease in braking power caused by heat build-up from constant use.
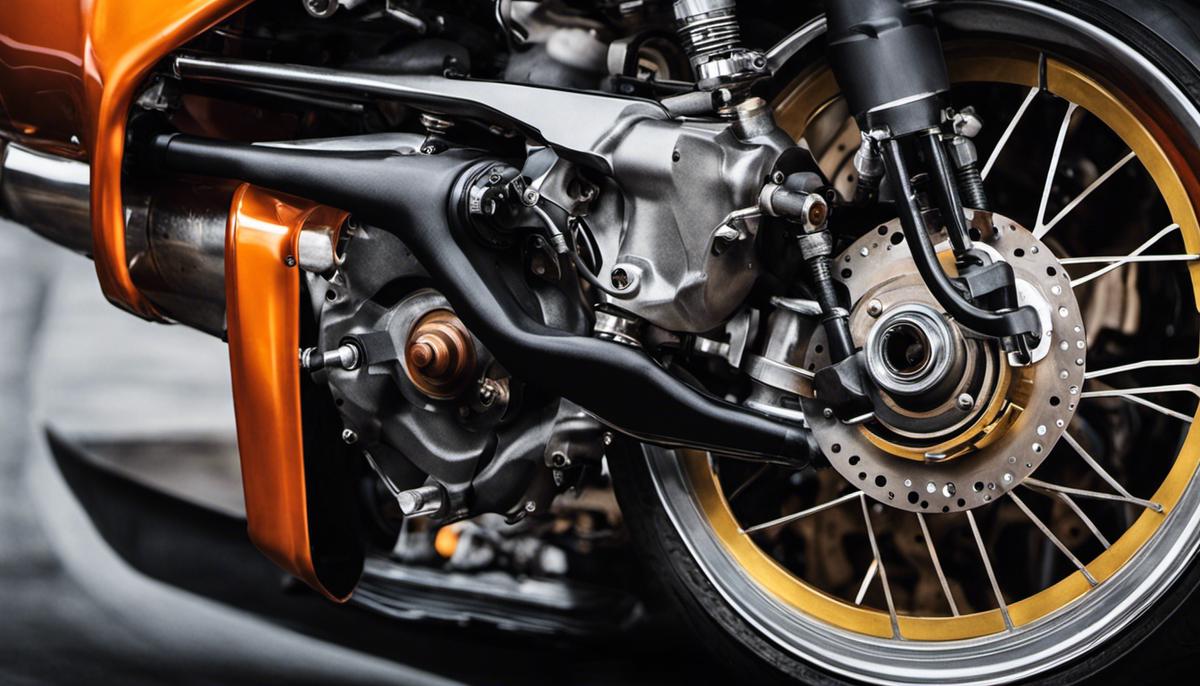
Disc Brakes: The Modern Marvel
Disc brakes have gained considerable popularity in recent years, particularly on high-performance dirt bikes. Instead of a drum, a disc (rotor) is attached to the wheel. The calipers and brake pads clamp onto this disc when you apply the brakes, slowing your bike down.
Their more open design allows better heat dissipation, resulting in better stopping power and less chance of brake fade. They also typically perform better in harsh conditions, offering more control and precision in your ride.
That said, disc brake systems can be more complex and may require more regular maintenance, especially in demanding riding conditions. They’re also generally more expensive, both in terms of initial costs and replacement parts.
Identifying Your Brake Type
Unless you’re a veteran rider, it might not be immediately obvious which brake system you have. But, identifying it is simpler than you might think.
A brake drum is a large, round, closed-off metal cylinder. On the other hand, a brake disc is a flat, round piece of metal with holes or slots in it, and you’ll typically see the metal brake caliper mounted over it.
Should you wish to switch systems, keep in mind that this involves extensive modifications to your bike. Unless you’re an experienced DIY enthusiast or a professional mechanic, it’s best left to the pros.
Table: Drum vs. Disc Brakes: A Quick Comparison
Drum Brakes
Disc Brakes
Braking Power
Lower
Higher
Maintenance Efforts
Lower
Higher
Performance in Harsh Conditions
Good
Excellent
Chance of Brake Fade
Higher
Lower
Costs
Lower
Higher
Now that you’re well acquainted with the types of brake systems on dirt bikes, it’s time to ensure you’re adequately equipped to handle any required maintenance or potential issues that may arise. Knowledge not only fosters confidence but also underpins safety and performance. Let’s dive into some repair tips and tricks next!
Repairing Your Dirt Bike Brake System
Just as a warrior relies on their armor, a dirt bike rider leans on their bike’s brake system for safety and optimum performance. It’s inevitable that at some point, these brakes need maintenance and repair. Understanding how to fix various components of the brake system yourself not only saves you money and repair shop visits, but it also keeps you prepared for emergency situations on the trail.
In the sections below, we will guide you through the steps of repairing your dirt bike brake system. This includes diagnosis of common problems, the process of repair, and prevention of future issues. Armed with this knowledge, you can ensure a safe and enjoyable ride every time you hit the trail.
Diagnosing the Problem
The first step towards effective brake maintenance is understanding what’s wrong. Some issues may seem minor but may actually signal deeper problems. Issues may range from waning brake power to squeaky brakes or leaking brake fluid.
Firstly, you need to visually inspect your brake system. Look for any signs of damage, such as leaks, corrosion, or physical damage to the brake lines and other components. Let’s discuss each scenario next.
Decreased Braking Power
A gradual loss of brake power over time might indicate worn brake pads or rotors, or even insufficient brake fluid. Pay close attention to changes in your bike’s braking behavior. If you’re finding it harder to stop or slow down your bike, it might be time for a brake check.
Test your brakes by applying pressure to the brake lever. If you have to apply more force than before or the lever feels spongy, then you might need to replace your brake pads or top up the brake fluid.
Squeaky Brakes
Everybody hates squeaky brakes; they are not just annoying but may also indicate a problem. Squeaky brakes may result from glazing, a process where your brake pads harden due to excessive heat.
Try sanding the brake pads lightly to remove the glazed layer. If this does not solve the problem, consider replacing your brake pads.
Leaking Brake Fluid
Leaks in your brake system can lead to loss of brake power. Check for any visible signs of leaks along the brake lines. Remember to look for wet patches or drips under the bike when it’s parked for extended periods.
If you find any fluid leaks, you may have to replace your brake lines or repair the master cylinder. Consider consulting a mechanic if the leaks persist.
The Repair Process
Now that you’ve diagnosed the problem, it’s time to get your hands dirty. Repairing your dirt bike brakes can be simple if you have the right tools and a basic understanding of the bike parts.
Remember to prioritize your safety. Always wear safety glasses and gloves when working with brake fluid and other bike components. Let’s delve into the specific repair tasks in the following sections.
Prevention of Future Issues
Routinely inspect your brake system to detect any issues before they escalate. A few minutes before each ride can save you a lot of trouble down the trail. Consider these preventive measures:
Regular inspection of brake lines for any visible damage or leaks.
Checking brake fluid levels regularly and topping up when needed.
Replacing your brake pads once they’ve worn thin or show signs of heavy wear.
With regular maintenance, the most common brake problems can be avoided. Get in the habit of routine bike checks for a smooth, safe ride every time.
We hope these tips help you navigate the path of dirt bike brake repair. Remember, knowledge is power—the more you understand your bike’s brake system, the better care you can provide it.
Step by Step: How to Fix Common Dirt Bike Brake Problems
Having a solid understanding of how your dirt bike’s brake system operates empowers you to find and fix potential issues. You’re not merely at the mercy of warning signs, but you can actively maintain the system to ensure optimal performance. Below, we’ll delve into some common dirt bike brake problems, offering insights, steps, and solutions that will help you keep your beloved bike in great shape.
Repairing your dirt bike brake system can be a straightforward process if you prepare for it adequately and know what to look for. So, strap on your helmet and get ready to delve into the exciting world of dirt bike brake maintenance and repair!
Loss of Brake Power
If your dirt bike brakes aren’t as responsive as they should be, it might be due to worn-out brake pads or an issue with the brake fluid. Routine maintenance and a keen eye for detail can help prevent this issue.
First, inspect your brake pads. If the padding is less than 2mm thick, it may need to be replaced. Additionally, glazed or burnt pads can cause friction, lowering the overall braking power. In this case, changing the brake pads should help restore your bike’s braking power.
Another possible reason for the loss of brake power is air in the brake lines. This is a common problem, especially if you’ve recently changed the brake fluid. Bleeding the brakes to remove any trapped air should resolve this issue.
Squeaky Brakes
After repeating the engagement and release cycle for a while, telltale squeaky noises may start emerging from your brake system. Don’t panic – this isn’t an immediate cause for concern and is often a sign of brake dust build-up.
Using brake cleaner spray often resolves this problem by washing away any dust, sand, or dirt that might have accumulated. Additionally, sanding down the pads lightly can also help reduce the squeaking sound. It removes any glazes formed on the brake pad’s surface and helps restore optimum function.
However, if the squeaking continues even after cleaning and sanding, it might be time for a brake pad replacement.
Leaking Brake Fluid
A leak in your brake system can be extremely dangerous, reducing your bike’s stopping power and making you susceptible to accidents. Regular checks can help identify a potential leak before it escalates into a larger issue.
Check the brake fluid reservoir and lines for leaks, as well as the seals on the master cylinder and brake caliper. Discolored areas around these components or a notable decrease in brake fluid level are common signs of a leak. If found, replace the leaking component immediately.
Also keep an eye out for any softness or sponginess in the brake lever or pedal. This typically implies a lack of hydraulic pressure due to low fluid levels, and rectifying this issue should restore optimal brake function.
Brake Rotor Warpage
Overheating often leads to brake rotor warpage. While riding downhill or making sharp turns, if you’re continually using your brakes, they might heat excessively, causing the rotor to warp due to the extreme temperature.
This results in a ratchety, uneven brake feel, reducing the effectiveness of your bike’s brake system. Regular checks of brake rotor condition and replacing warped rotors can help prevent this issue.
Furthermore, use the front and rear brakes uniformly to minimize brake overheating and eventually, rotor warpage.
Best Brake System Parts for Your Dirt Bike
With a plethora of brake system parts available in the market, it can be a challenge deciding what’s best for your dirt bike. These parts vary in make, functionality, and are designed for specific riding conditions and bike models. Let’s break down your options and shed light on top-quality parts you should consider for a smooth off-road ride.
Understanding the performance and durability of various brake system parts is essential, as these aspects directly influence your safety and control while riding. A reliable braking system enhances your dirt bike’s response and ensures that you can stop swiftly and efficiently even under extreme conditions.
Top-Quality Brake Pads
Brake pads are your bike’s first line of defense. They make contact with the rotors, generating necessary friction to stop your bike. When choosing brake pads, three aspects matter most- material composition, durability, and heat performance.
The most common types include organic, semi-sintered, and sintered brake pads. Organic pads are soft, thus offering quiet operation and lesser rotor wear. Semi-sintered pads strike a balance between performance and longevity. However, sintered brake pads are the most popular due to their excellent performance in various riding conditions and extended lifespan.
Some of the well-regarded manufacturers for brake pads include Brembo, EBC, and Galfer. They offer a variety of options to support different riding dynamics and preferences.
High-Performance Brake Rotors
Various factors go into choosing the right brake rotors for your dirt bike. These include the material, their heat dissipation capability, and how well they interact with the chosen brake pads.
Stainless steel rotors are the most common due to their resistance against corrosion and relatively low cost. Alternatively, you can opt for carbon composite rotors which are lighter and offer better heat resistance, though they come at a hefty price.
When it comes to brands, Tusk, EBC, and Brembo top the charts. They excel for their superior quality, excellent heat dissipation, and the ability to deliver powerful, smooth stops.
Reliable Brake Lines
Brake lines are crucial in delivering brake fluid from the reservoir to the calipers. Opting for durable brake lines can enhance your dirt bike’s braking response time.
The two main types are rubber and braided stainless steel lines. While rubber brake lines are cheaper and more flexible, they tend to expand due to heat and pressure, affecting your bike’s braking performance. On the contrary, braided lines are more durable, resistant to expansion, and provide more responsive braking.
Goodridge and Galfer are renowned brands for brake lines and are favored for their top-notch quality and enhanced performance.
Dependable Brake Fluid
Choosing the right brake fluid improves your dirt bike’s braking performance and prolongs the system’s lifespan. It is essential to pick a brake fluid with a high boiling point to prevent vapor lock and maintain optimal braking.
DOT 4 and DOT 5.1 are your best bets, as these hygroscopic fluids are designed for high-performance applications and have higher boiling points. However, DOT 4 is more commonly used due to its wide availability and comparatively lower price.
Motul, Castrol, and Shell offer some of the highest-quality brake fluids on the market, notable for their excellent heat resistance and optimal performance.
Conclusion
Understanding your dirt bike’s brake system is key to optimizing its performance. Both maintenance and repairs are vital tasks that, once mastered, should assist in mitigating potential issues and ensuring a safe and exciting ride. Whether you’re dealing with a classic drum brake or a modern disc brake, it is essential to have a solid grasp of your brake system’s components and how they work together.
With this newfound knowledge, you can confidently handle common brake problems, enabling you to quickly get back on the trails. Here’s to your next ride—smoother and safer—with brakes you’ve become well-acquainted with.


")